
How to make your pattern paper work for your style
Have you ever told yourself that you cant play with certain papers due to their colors or style? Sometimes I find myself saying that, even though I am looking at a paper that I LOVE and must have. But it ends up sitting there in my stash cuz I am afraid to touch or cut into it or I just don't buy it....which breaks my heart.
So while playing with My Little Shoebox products for my assignments for the month of September, I thought I would give a tutorial for those of you that are afraid to try something new or out of your comfort zone. For example: My Little Shoebox is known for CUTESY papers. And not that its bad.... I know that there are people out there that will just say "oh no, that's not for me!" Are you one of those people? Well I want you to check this out and I will show you, that no matter what kind of paper you are working with...you can make it to work for you and your style.
I will be using this line as an example for today's tutorial, because it just happens to be my line to work with for the month of September. LOL
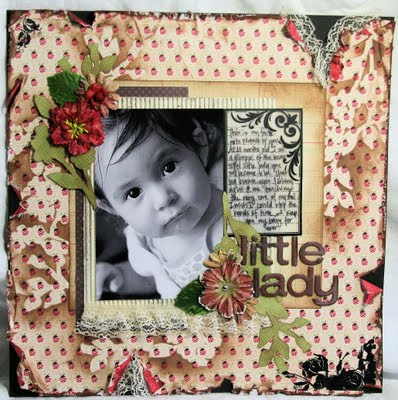
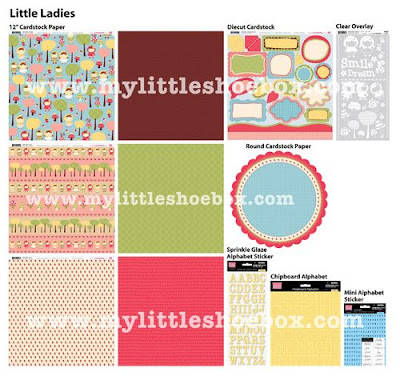 I wanted to create something vintage, romantic or a grungy looking page. And my dilemma was that the papers were too bright and cutesy. But I thought with a little distressing, inking and tearing I can make it work. So here is what I did:
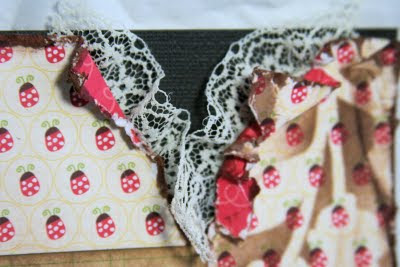
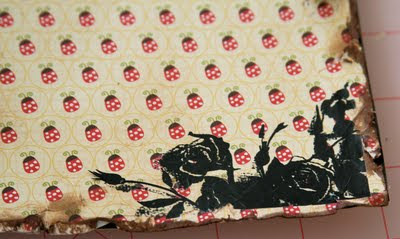
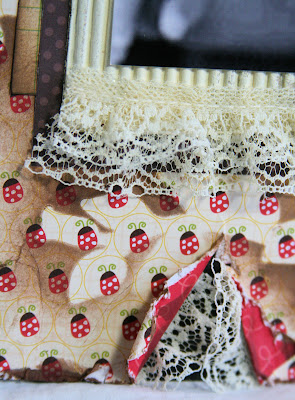
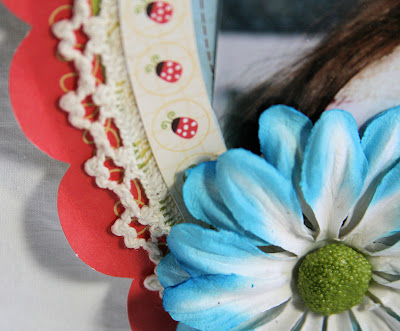
1.) I picked a pattern paper that I wanted as a back ground. Used my scissors and distress the crap out of it, to make the all the edges of my paper get that torn up look. Crumpled it up and distressed through out the edges with my brown Chalk Ink to age it. I actually created a rip page on top and on the bottom and added some vintage ribbon trim for more depth as you can see below. I thought it was sweet lookin!
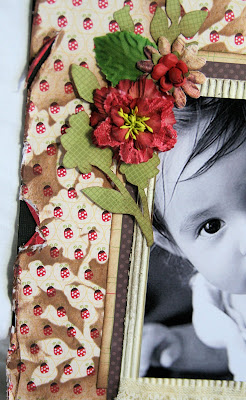
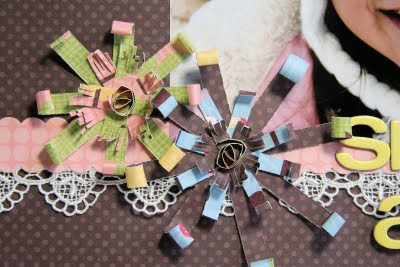
2.) I wanted to create more depth in my LO so I used a Heidi Swapp Flower Mask to add to my background. Of course you can use what best suits your page.
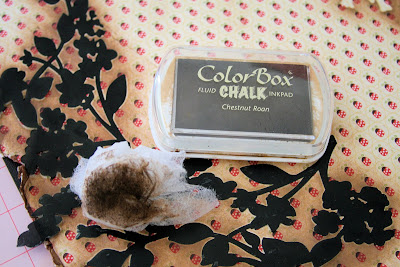
3.) I tried using my ink directly to the mask but it was coming out too dark. But I didn't have Tim Holtz tool (ink blender thingy).... so what did I do? I went to my laundry room and grab a used fabric softener sheet right out of my dryer. YUP! They work just fine as you can see below. Not that I want to take any business away from Tim (he is the MAN and I bow down) but, just in case you don't have one and you don't want to go running to your LSS and buy one in the middle of creating your page, you can use them and they work perfectly.
It created a soft color over the mask. You can make it as dark or as light as you want and the tool is free and you are recycling. Cool huh? Picture below is what the page looked like after finishing all the masking technique.
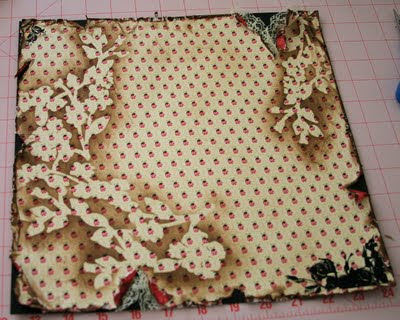
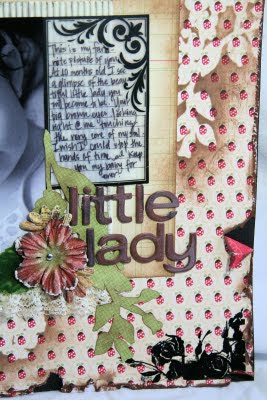
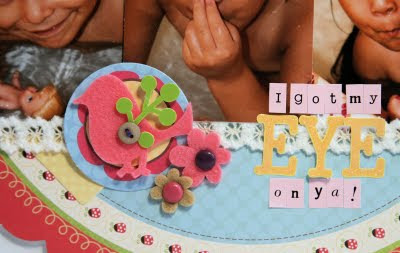
4) I added a couple of rub ons on each corner for added interest and depth.
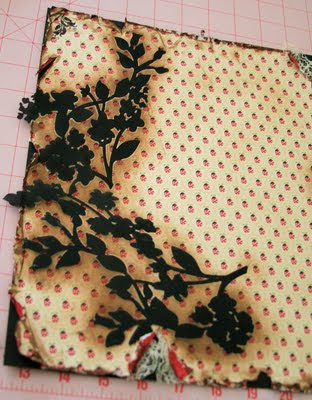
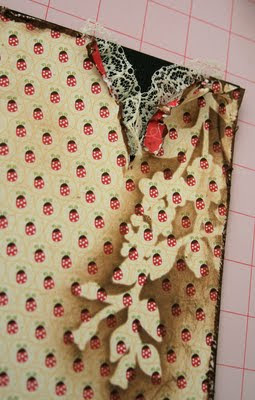
5.) I knew I wanted some leaves or vines in page. But if you look at the entire line, I didn't have that option. I usually cut out designs from various PP and add to my pages. But since I didn't have that, I created my own. Using the same HS flower mask....I traced it with a pencil in a coordinating paper and cut it out.
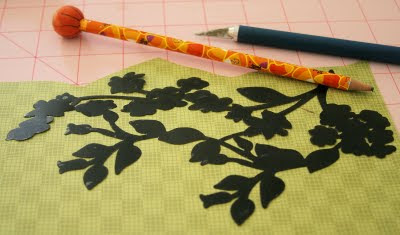
Below picture shows what it looks like cut out. I didn't trace everything in the mask. I just chose a part of it that I liked and used that. Besides I wanted to save some time from all that cutting. I kept one long and the other apart. If you look closely you can tell they are the same pattern but that one is longer than the other.
 And that's about it as far as the background paper for your page. You can now play with your picture, mat it, pick some embellishments to add to your page and just play around until you are happy at where everything is.
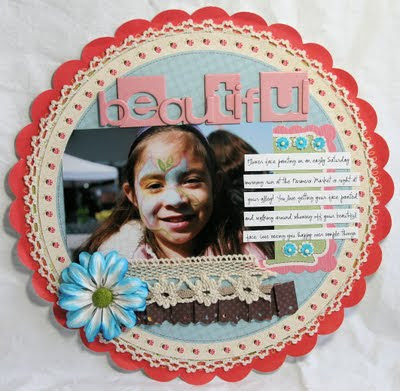
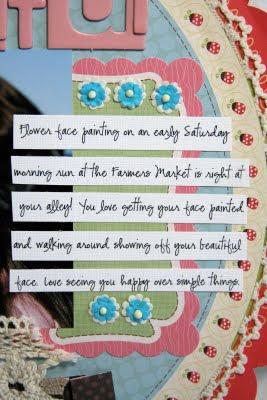
I happened to used a distressed corrugated board with cream paint as mat for my picture. Matted that with another PP from Imagine a Forest Line and inked all edges to match my page. Put my journaling on a Maya Road sheer journaling spot and used my own handwriting for my journaling. Added a couple of flowers to finish the page and I'm done!
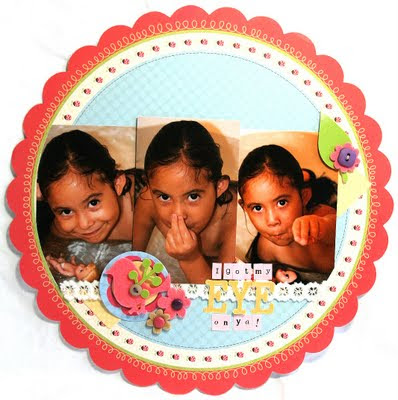
Here is my finished project with detailed pictures:
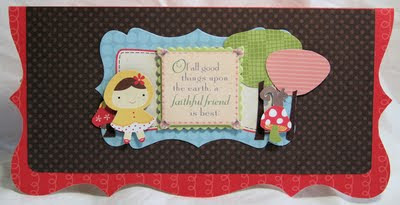
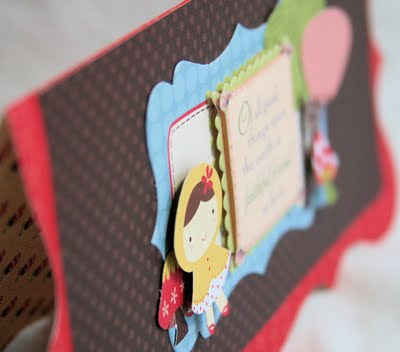
Here are my other projects for My Little Shoebox for September.


We are so thrilled to be working with Pencil Lines for this month. They have provided all of the MLS Design Team with Sketches to work with. Here is my take on the sketch. Check out Pencil Lines and see all of the MLS DT's work as well as their DT's for this months sketches. Great inspiration to be seen.


23 comments:
This is an amazing tutorial! Thank you so much for sharing it with us all.
Awesome tutorial Cheng! Thanks for sharing! Love your MLS projects! :)
what a brilliant tutorial, tfs!!!
love this tut!!
beautiful projects!
and i will certainly not be afraid of distressing the *piiip* out of colourful papers anymore!
Great tutorial!
gorgeous projects and great tutorial!
beautiful, beautiful, beautiful!!!! Thanks!!!
- Ingrid
Wow this is just amazing... I never thought of using masks that way.... Thank you so much for sharing...
//Katarina
Amazing Tutorial Michelle, I love your project...
Thanks for the tutorial! It rocks!!
Gorgeous creations!
AWESOME Michelle! You rock!
Wow, what stunning layouts and a great tutorial!
Michelle, this is awesome! I am going to buy this entire line for my store now. SOLD! Love it!!!!
Michelle @ AMM
these are gorgeous great work!
gorgeous layouts!
I think you did a great job and I am going to try it! I love that you used regular ink to distress...that means that I don't have to buy something "special" to do one thing and I am stuck with it if I don't like it.
For your first time, you did an amazing job :)
Gorgeous work and great tutorial! TFS!
ok, I am so using this tutorial....thank you so much...that is one amazing page...it jumps off the screen literally at you! Amazing.....
I absolutely love your layout.. Great tutorial.. thank you so much for sharing..!
:)Giselle
It is an amazing layout and the tutorial is awesome. Thanks for sharing. Looking forward to more such tutorials :)
These are amazing! Great job!!!
Wonderful! And your wrk is just beautiful. Glad you shard this link on WT!
michelle,
this is just gorgeous, tfs your tips!
i love your style, can't wait to play with little lady myself now.
blessings,
erin yamabe
Post a Comment